Installing Auto Meter Fuel Pressure Gauge With Racepak USM/IQ3 On NB Miata
Published: October 11, 2014; updated: October 22, 2014
Acknowledgements
A general outline of the process as well as many tips and suggestions were given to me by Emilio Cervantes of 949racing fame. Thank you Emilio!
I learned much about fittings, lines and hardware from the helpful folks at Nissan Road Racing Forums.
Tools Needed
- Fuel line disconnect tool - 5/16" size is the correct one, however I succeeded using a 3/8" tool. This one should work.
- PTFE/teflon/thread sealing tape.
- A set of SAE wrenches.
- Rags to catch fuel spills.
- A fire extinguisher.
- Wire stripping and crimping tool.
- Small flat blade screwdriver.
- Phillips screwdrivers.
- Drill and drill bits.
Gauge
I found a brand new Auto Meter oil pressure gauge in my pile of spare parts and decided to repurpose it into a fuel pressure gauge.
Technically the only difference between an oil pressure and a fuel pressure gauge should be the label on the gauge face. I also confirmed with Auto Meter that all their senders of the same type and range are identical, the difference is only in the gauge. As I started with a 0-100 psi oil pressure gauge, I could buy a 0-100 psi fuel pressure gauge and use the fuel pressure gauge with the oil pressure sender. In my case I intended to wire the sender into my Racepak IQ3 dash, as such I only had a temporary need for a gauge.
Relieving Fuel Pressure
There is a procedure for relieving fuel pressure that you can follow. Alternatively just leave the car sitting for a day or two and fuel pressure will die on its own. I did not relieve fuel pressure but I did not touch the car for probably a week if not more and very little fuel came out of the lines.
Fuel Lines
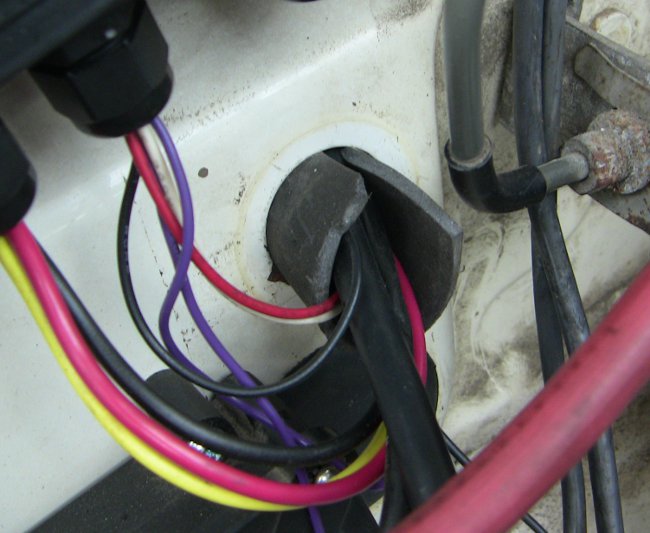
The fuel lines are located on the right (passenger) side of the engine compartment. On NB Miatas there is a hard line going from the fuel tank into the engine bay, then a plastic fuel line that makes a U into the fuel damper, then another plastic line going to the fuel rail on the engine.
This is the OEM plastic line we are going to replace (picture is of a different car without coolant reroute):
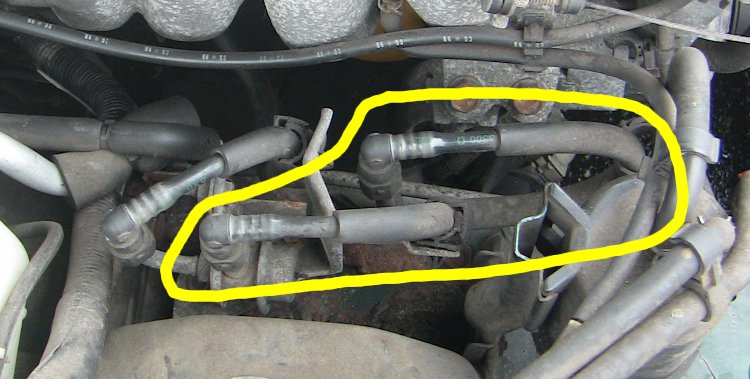
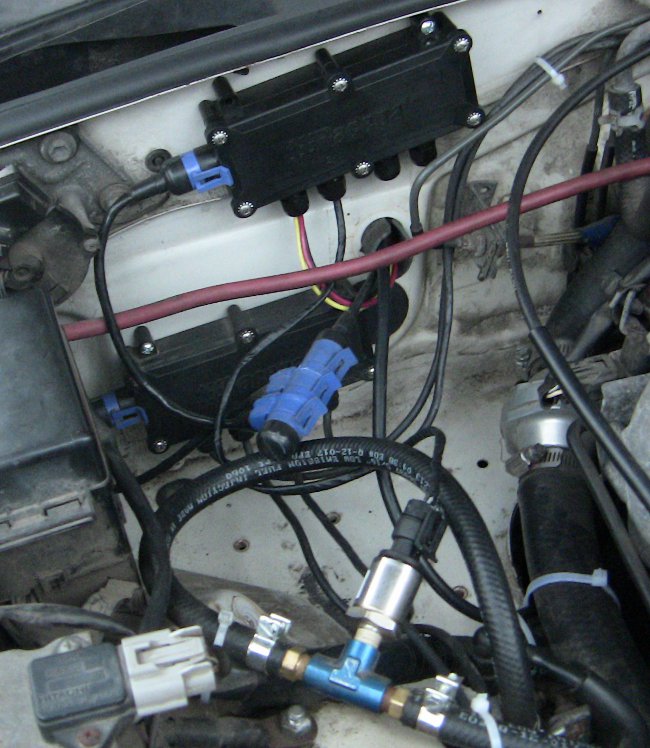
And these are the rest of the fuel lines:

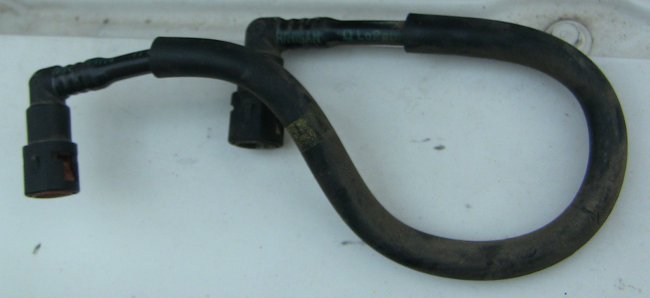
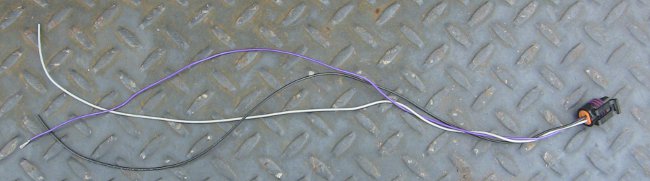
The yellow arrows indicate connections to the middle fuel line that we are going to install the gauge in which I already removed from the car. This is the removed plastic line:
Disconnecting Fuel Lines
Before disconnecting fuel lines grab a fire extinguisher and position it in an easily reachable spot, and disconnect the battery.
Also, grab some rags and put them under the fuel lines to catch the fuel that will come out of the lines.
I was initially stumped how to use the fuel line disconnect tool but it is actually very simple.
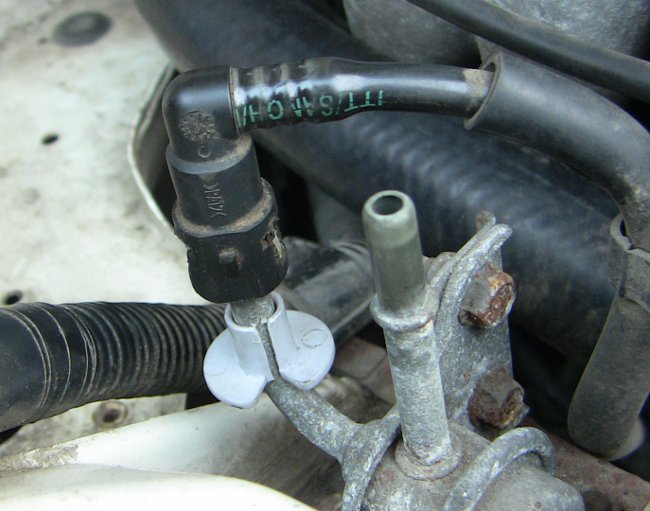
First, take the tool of appropriate size and clip it on the hard fuel line below the connection:
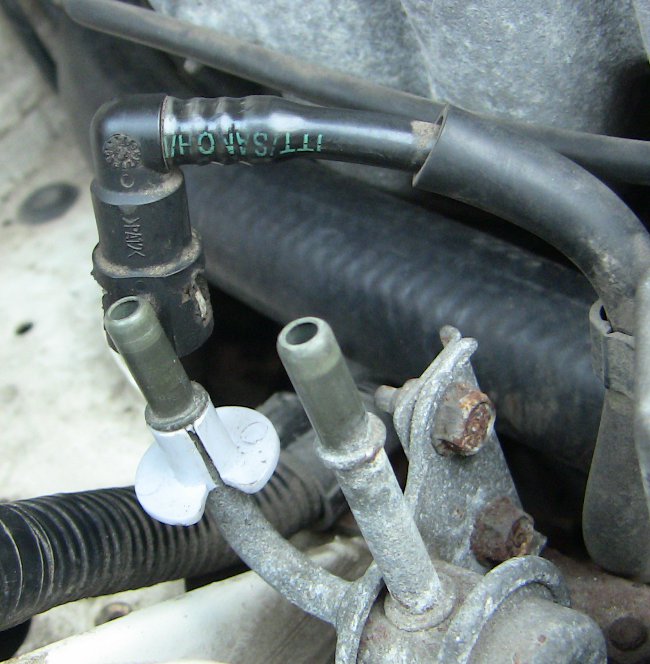
Then, push the tool up into the connector. The tool will release clips inside the connector:

Finally, pull on the soft fuel line and it will come straight off. If the fuel line is not coming off, keep pushing the disconnect tool into the connection:
Plumbing Parts
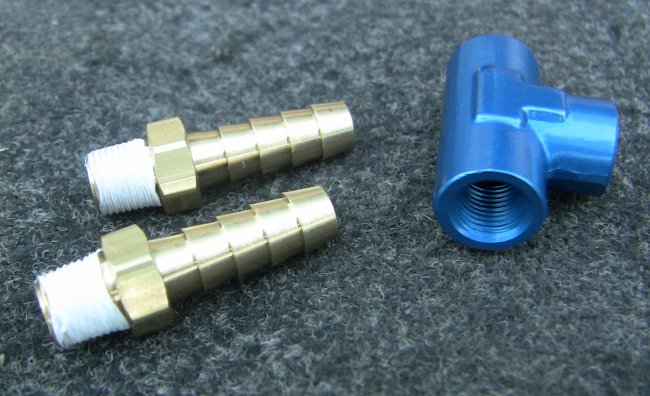
Working backwards from the sender, the sender has 1/8" NPT threaded tip. The sender screws into a tee, which can be this Earl's part 991701ERL 1/8" NPT female tee in pretty anodized blue.
On either side of the tee I have a 1/8" NPT to 5/16" barbed hose adapter. I used McMaster-Carr part 5346K15.
Attaching these fittings will require SAE wrenches.
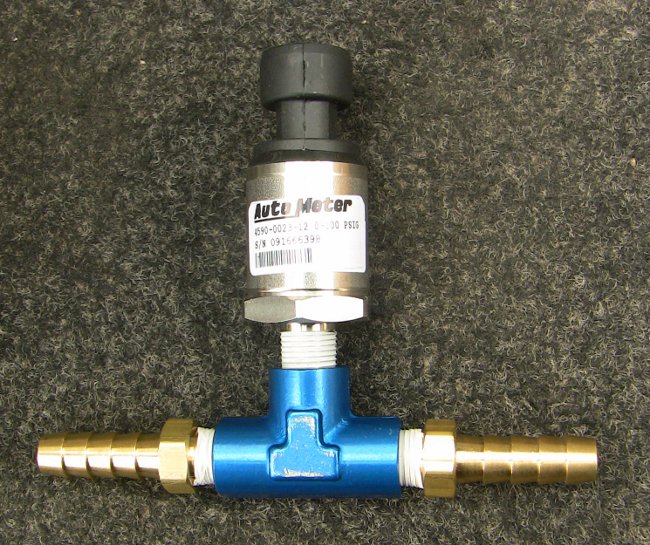
Here is the tee with the sender and adapters installed into it. Teflon tape1 is used on all NPT connections.
Alternatively, this thread suggests the use of Moroso 65360 fuel pressure gauge fitting. This fitting, being made entirely out of aluminum, should be lighter than an aluminum tee with brass adapters on either end. However, this fitting is for 3/8" hose and Miata fuel lines are 5/16" in size. I don't know how significant this difference is.
As you will see shortly, a simple tee makes for some awkward hose routing. I want to get two 1/8" NPT male to female elbows like Earl's 991401 to make the bends more compact.
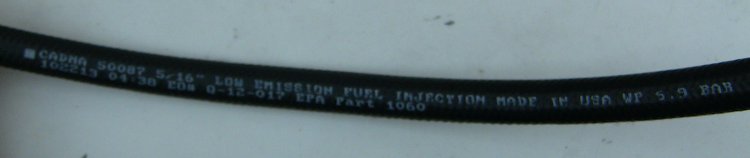
NB Miatas have plastic fuel lines in the engine bay that cannot be cut and spliced together. Therefore to connect the tee to the rest of the fuel system we need some 5/16" ID fuel injection hose. You need fuel injection hose rather than ordinary fuel hose as ordinary fuel hose is rated for something like 20 psi which is nowhere near enough.
I originally bought Jegs nylon 5/16" hose and it appears to have 5/16" OD rather than ID which makes it way too small. I procured correct size hose at the local auto parts store, which had it a good deal cheaper than Jegs. This hose was rated to 5.9 bar which is about 85 psi; I've been told that normal fuel pressure in a Miata is about 58 psi but after installing the gauge I saw 62 psi in my car.
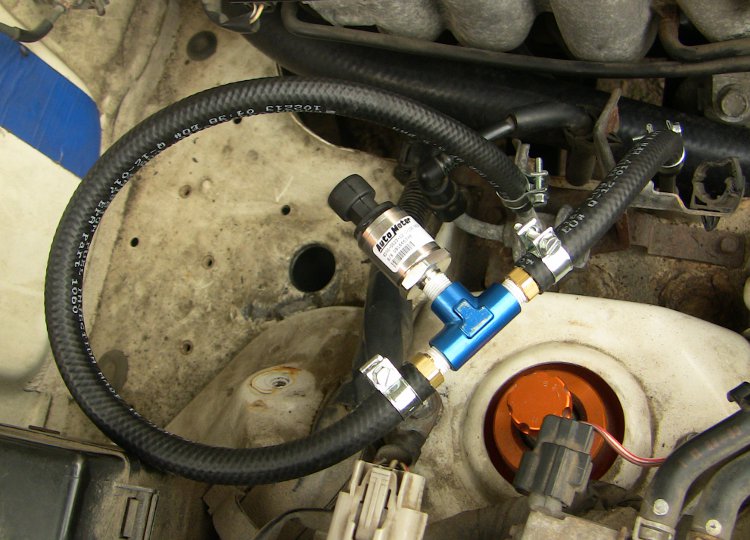
Cut the hose to length and install in the car. Use fuel injection hose clamps to secure the hose.
Important: I did not tighten the hose clamps enough over the OEM non-barbed nipples (for lines in the car) and they leaked once I started the car, and subsequently leaked more on the first test drive. Tighten those clamps!
This is what my first pass looked like:
McMaster-Carr Aluminum Fittings
I initially thought I could use McMaster-Carr aluminum fittings like 44705K333 and 44705K155. This however is a poor idea for two reasons:
McMaster-Carr fittings do not have wrench flats that Earl's fittings do. Meaning, there is no easy way to get a wrench on the fittings to tighten them. And it is definitely a good idea to tigthen fittings on fuel lines.
I actually ordered two 44705K155 elbows and while fiddling with them I screwed them one into another by hand. When I was taking them apart the threads locked and the parts became inseparable! The threads on McMaster-Carr fittings look rougher than on Earl's fittings also.
Wiring
At this point you can wire the gauge. I was going to ultimately wire the sender into the USM thereore I ran test wiring just to make sure the gauge worked.
Per Auto Meter wiring diagram I ran a red switched power wire to the battery and a black wire to ground. I have a ground wire going from coil pack bracket to the right shock tower that is very convenient for the ground; Auto Meter wiring harness was long enough to reach the red wire to the battery in the trunk. Put the gauge somewhere you can see it where it will not fall off and connect the wiring harness to the gauge.
Checking For Leaks
In my eagerness to start the car after reassembly I started the car and then checked to see if there were any fuel leaks. Sure enough, the clamps going on factory non-barbed nipples were not tightened enough and fuel was spraying all over the fender!
Turn the key to on but do not start the car, check for leaks, then start the car. Although when the key is set to on position but the engine is not running my gauge shows zero fuel pressure, therefore leaks may not actually be detectable in this way.
Solution in my case was to tighten the clamps over the factory nipples more.
Racepak USM
To log fuel pressure data to my Racepak IQ3 dash I ordered another Racepak Universal Sensor Module (USM). I already had one USM in the car but it was fully used.
For reference, this is how Vnet cables are daisy-chained:
I needed to find a location to mount the second USM. The first USM was originally attached to the left fender on the inside. There was no room there for a second one:
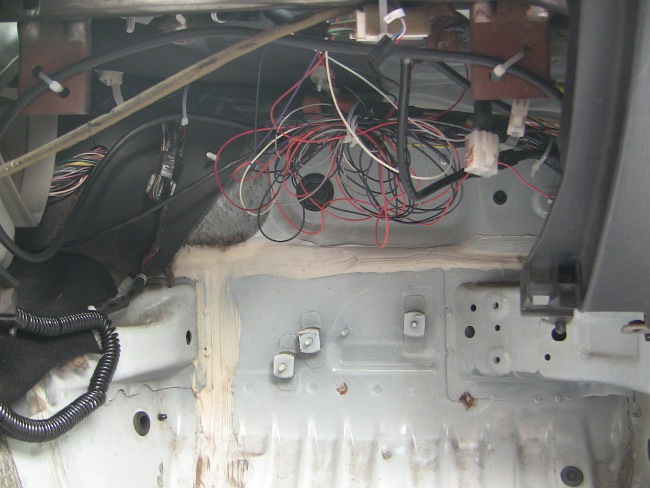
I removed the windshield washer bottle and this freed up a bunch of space on the right side of the firewall:
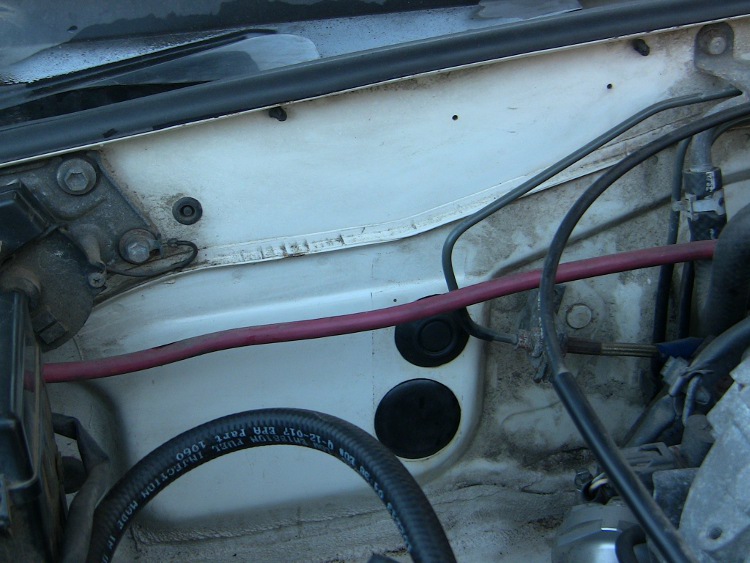
This space would be enough to fit both USMs. I already removed the A/C unit inside the car which is on the inside of the firewall. I also removed the cooling unit and carpet to ensure I do not accidentally drill through a wire harness.
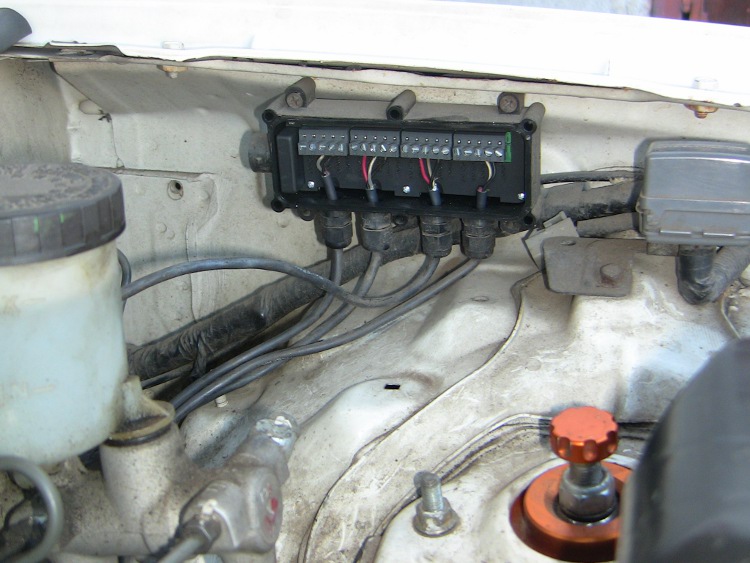
Drill holes through the firewall and attach USMs with suitable fasteners. Here they are attached to my car:
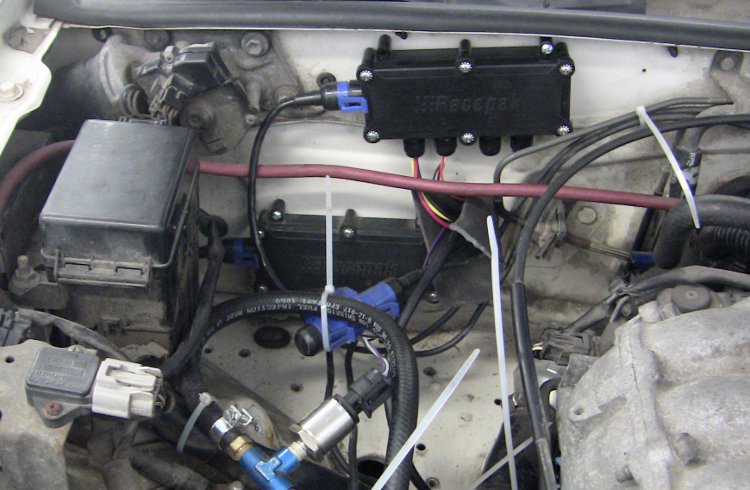
Each is attached with two machine screws with nuts on the opposite side. I had a helper hold the nut in position for the bottom USM from the passenger compartment while I tightened the screw; this operation may be doable with one person if you can figure out how to hold a wrench in position inside the car. The top USM is bolted through the top of the firewall. You need to maneuver around the plastic shield covering blower intake.
I used two screws for each USM as my original USM was attached by two self-tapping screws and it held up fine for 4 years. Racepak instructions strongly recommend using all four screws.
Screw size was a bit of an annoyance - I ended up going with #8 (SAE) screws and matching nuts from Lowe's. #10 looked like they would work but proved to be too big. Bring a USM to the hardware store and try fitting the screws you bought through the holes to save multiple trips.
The top USM is tilted so that the Vnet wire coming out of it does not hit the wiper motor. This USM is also as far toward the driver side as it can be without interfering too much with the brake line right below it. I bent the brake line slightly for more room.
The bottom USM is as far toward the left side of the car as it will go with the screws going through the flat part of the firewall just right of the bottom hole for A/C lines (left = driver side, right = passenger side).
I am pleased with USM placement, but zip tying Vnet connectors to fuel lines seems suboptimal. McMaster-Carr sells mountable cable holders and mountable zip ties that I will try.
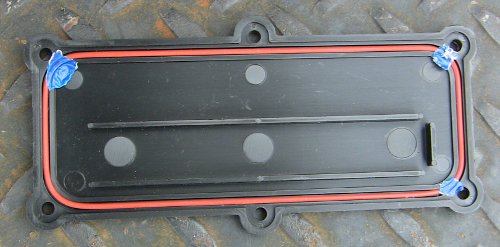
The o-ring on the USM cover refused to stay in its groove. A little racer's tape to the rescue:
USM Wiring
This was much easier than I anticipated.
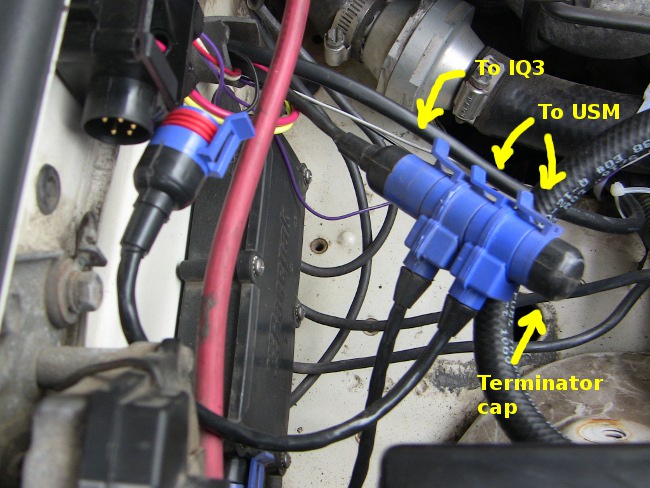
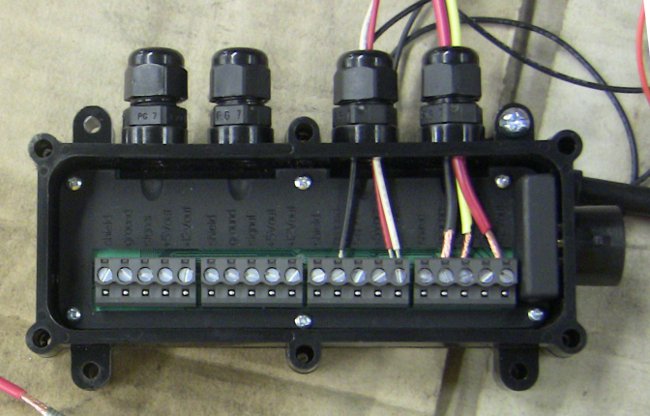
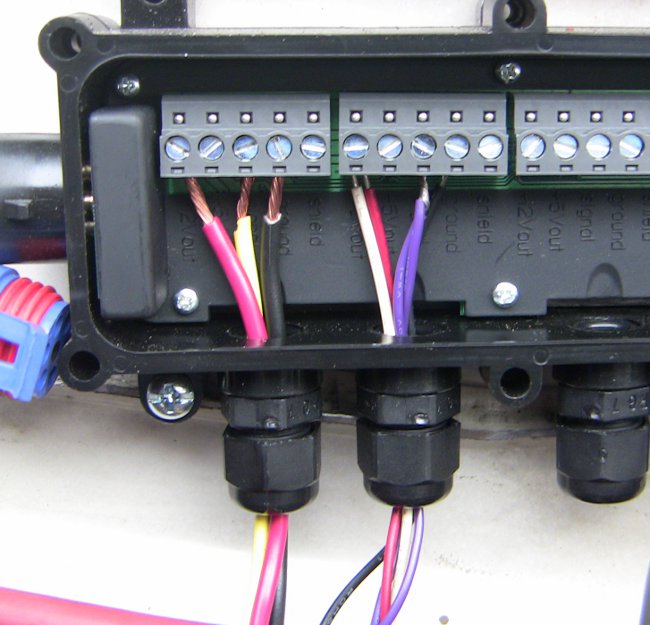
The USM has +12V, +5V, signal, ground and shield posts for each of the four sensors. Auto Meter fuel pressure gauge came with a wiring harness. Simply stick each wire into the appropriate post and tighten the screws on the USM:
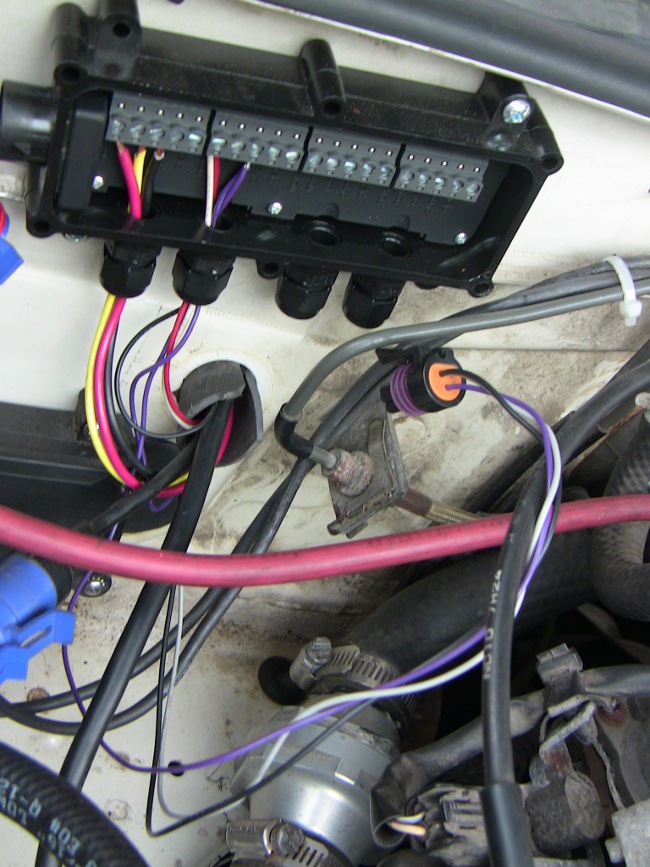
The top (smaller) hole from A/C lines is big enough to feed Auto Meter wiring harness with plugs through it.
Auto Meter instructions say to have a fuse on the 12v power lead. I bought these inline fuse holders from McMaster-Carr but they came with 12 gauge wire which was too big for my connectors. For the time being I connected the Auto Meter gauge without a fuse. McMaster-Carr has these 14 gauge fuse holders and these 16 gauge fuse holders that do not have a blown fuse indicator. I will be trying them later.
It is also worth noting that Racepak sensors do not have a fuse between the USM and the sensors. I called Racepak and was informed that power coming out of IQ3 is fused.
I initially wired power and ground into the USM but not signal. This way the gauge powered on and worked but IQ3 was not receiving the data. To get data into the IQ3 I cut the purple wire going into the sender about a foot from the sender so that I had a long length of this wire still in the Auto Meter wiring harness and a short length of this wire in the plug going to the sender. Then I attached both ends at the cut to the USM signal post.
Per Auto Meter tech support, wire colors for the sender connector are:
- Black: ground
- Gray: 5 volts reference
- Violet: signal
Spec for the signal for Auto Meter 0-100 psi full sweep electric pressure sender for entering into IQ3 configuration:
- 0.5 volts => 0 psi
- 4.5 volts => 100 psi
Gauge Holder
I kept forgetting to order a center console gauge holder and with two days to go before an event had to make my own gauge panel.
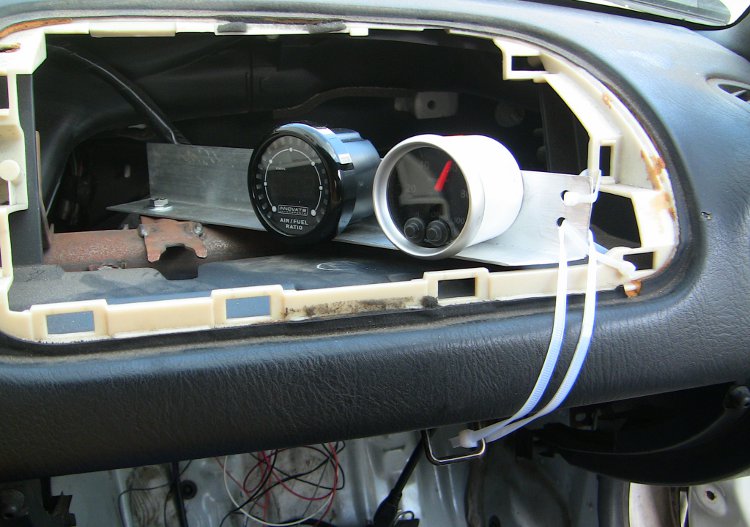
The gauge panel sits in the passenger compartment on the right side of the car, basically on the opposite side of the firewall from the USMs:
Wire Routing
I rerouted the IQ3-to-USM cable to come out of an A/C line hole on the right side of the firewall rather than on the left side where it was previously.
The entire Auto Meter wiring harness was then stuffed into the passenger footwell:
The thick wire is Vnet connection to IQ3 which would be fed through the firewall into the engine bay and attached to the USMs.
This works but is very messy. The next step is to cut the wires to length and install some quick connect connectors to make it easier to take everything apart. For now I zip tied all wires up into the dash:
To prevent the firewall cutting the wires I used some of the rubber insulation I cut out of the interior as a crude grommet. As my car came with air conditioning originally I still have the grommet fitting into the A/C hole; my plan is to use that grommet for a cleaner, more reliable installation. These grommets can also be ordered from Mazda Motorsports.
Here is a close-up of the temporary insulation:
Deleting The Gauge
Once I was satisfied that I programmed IQ3 correctly for the sender I removed the gauge.
First step is to cut the wire harness. I added slack to permit the sender to move around in the engine bay because I intend to change the plumbing to be more compact. Ideally plumbing should be done first and wiring second, of course.
Then I wrapped the entire length of the wires in electrical tape. The loose wires make a mess.
I tried to have a "flat" bundle of the three wires running the entire length of the harness. This did not quite work out but the important part, I think, is not wrapping wires one around another which I did succeed with. A helper was very handy for holding the wires while I wrapped them.

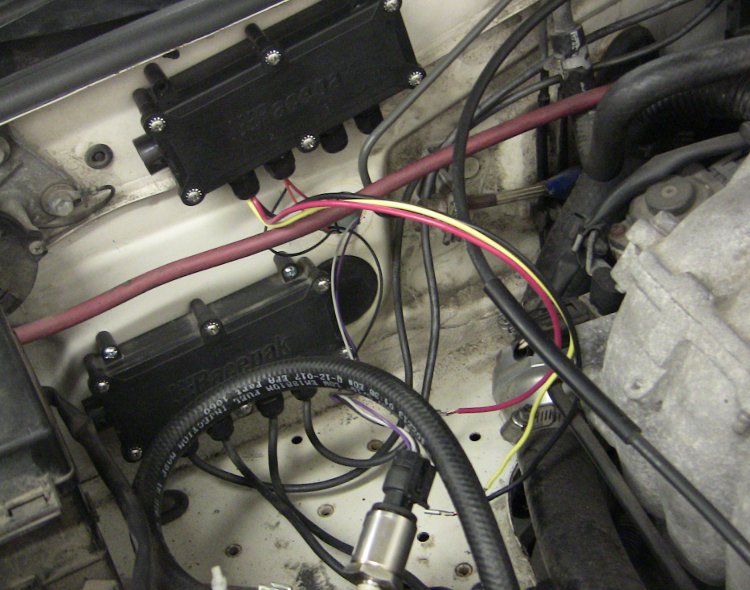
Next connect the harness to USM. Sender power wire uses 5 volts whereas gauge power wire uses 12 volts. Finished product:
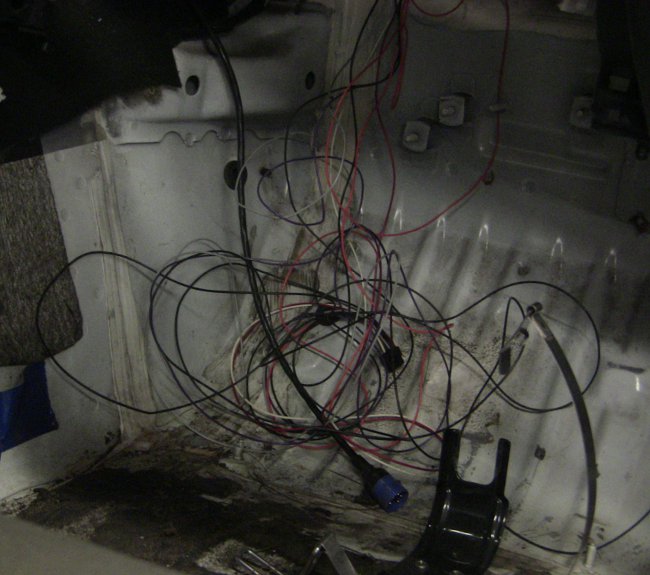
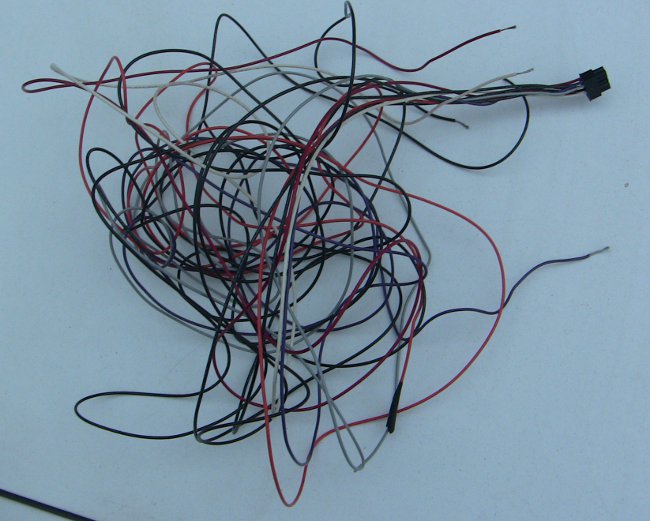
And this is the wiring that could now come out of the car:
Gauge And Sender Response Time
I have been advised to use mechanical gauges for oil pressure, because electric gauges are not responsive enough. However, Auto Meter senders are much cheaper than Racepak senders, leading me to wonder whether the poor response is a property of senders or gauges.
Once I had the sender wired into IQ3, the jitter in the readings looked similar to what I was getting out of my Racepak pressure senders. For a true comparison both types of senders would need to be measuring exactly the same thing, but I think I will try Auto Meter senders for oil pressure applications.
The gauge on the other hand seems pretty slow. I never saw the needle jitter. Fuel pressure is rather stable, but I definitely do not have the confidence to use electric gauges for oil pressure.
-
Auto Meter gauge installation instructions advise against using thread sealing tape, instead recommending the use of thread sealing paste. I inquired why this is so and Auto Meter tech told me that single-wire senders for electric gauges (these are from what I understood short sweep type, but double check) are grounded through the sender threads, and thread sealing tape may interfere with the grounding. For full sweep gauge type senders that use a ground wire it is fine to use thread sealing tape. ↩