Replacing Lower Ball Joint On EF Civic
Published: October 2, 2015
Removal
Due to the amount of work involved in ball joint replacement, reusing ball joints does not make much sense. As of this writing, new ball joints are available from local parts stores for $35 and for even less on Rock Auto.
At the same time, ball joints are often replaced because their boot gets torn. If you want to change the ball joint but the boot looks good, by all means keep the boot.
If you are keeping the boot, start by carefully examining how the boot is held on the ball joint. Usually there is either a wire going around the boot or a clamp of some kind. Carefully cut the wire or open the clamp and slide the boot off the ball joint.
If you are not keeping the boot, cut the boot off together with its retaining mechanism.
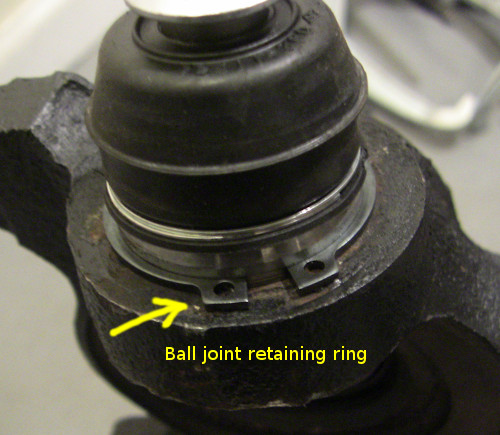
Next, remove a snap ring on the bottom of the ball joint (just under the knuckle when the knuckle is mounted on the car). The snap ring may be difficult to see under the grease and dirt that is often found on old ball joints, hence here is a photo of a snap ring on a new ball joint:
An excellent tool for removing snap rings is GearWrench 2012D / KD Tools 2012D. As of this writing it can be found online for about $45, and is worth all of that.
Lower ball joint replacement on 88-91 EF Civics is tricky because the top of the ball joint seat is not flat:
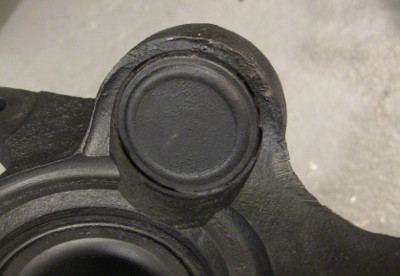
The outer half of the part of the knuckle around the ball joint is flat but the inner half blends into the rest of the knuckle. The result is that there is no way to fit a socket or a pipe over the top of the ball joint.
Parts stores offer a ball joint service kit but because it uses pipes it cannot be used with EF Civic spindles.
I succeeded in pressing one ball joint out with a ball joint separator tool which looks like this:

Harbor Freight sells one like this, and there is also an adjustable version. Mine is a non-adjustable separator that was purchased at Advance Auto.
Put the base of the tool over the top of the spindle where the ball joint seats like this:

And the pivoting end over the bottom of the ball joint like this:
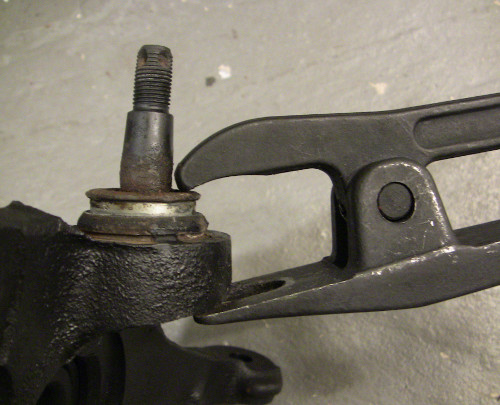
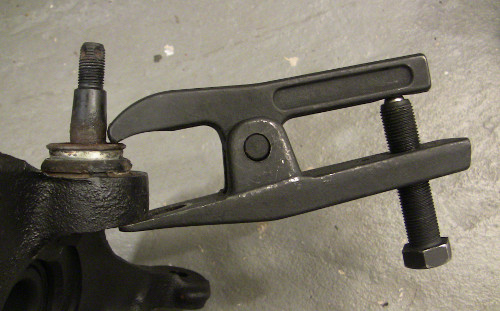
Then press the ball joint out, repositioning the tool around the ball joint to hopefully get an even press.
While I removed the ball joint without damage to the knuckle, the ball joint surface was somewhat mutilated by the tool. The other ball joint fared worse with several pieces breaking off of it. As I was not going to keep the old ball joints, I was not worried about damaging them.
Success:
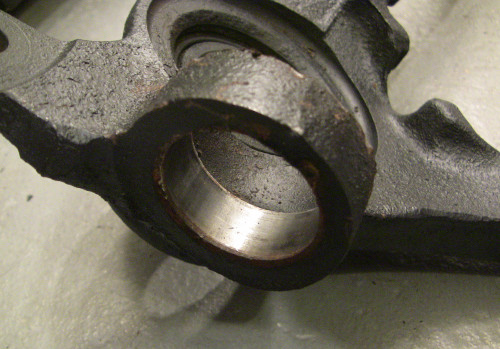
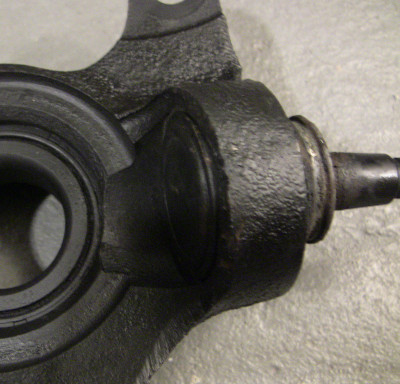
When I tried following the same procedure on the other side, the ball joint was not budging. There was dirt in the ball joint where grease is supposed to be and also on the top of the ball joint around the seat area which can be cleaned out with a pick:
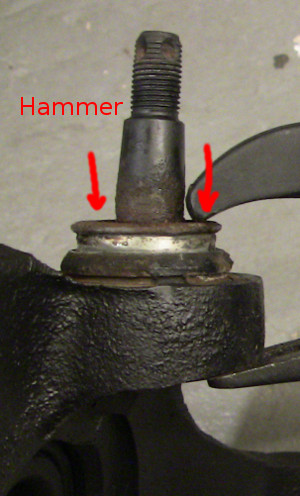
Even then the ball joint refused to move. After messing with it for half an hour I took a 4 lb mallet and hammered it out. Hit the base of the ball joint, not the stud:
Installation
For installation I used a ball joint master service set (Powerbuilt kit #72, part #940579) loaned from Advance Auto. While this tool does not help with ball joint removal, it makes installation a snap.
Position the clamp as follows:
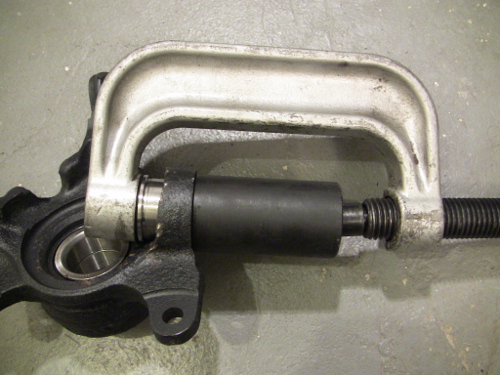
The long cylindrical piece is open on the left side as pictured and closed on the right side, with the end of the threaded rod fitting into the cap. This setup uses only 3 pieces of the service set.
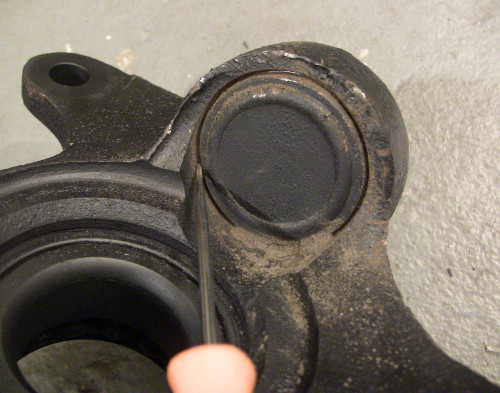
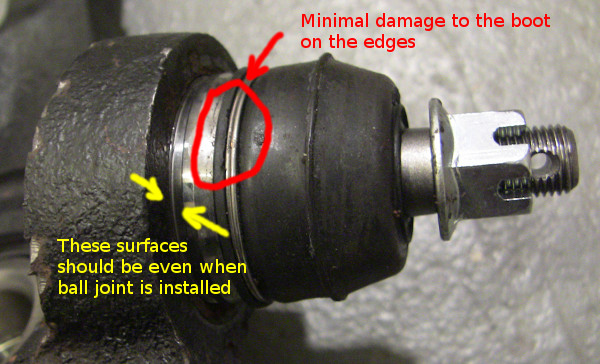
What is not visible in the photo is the boot of the ball joint. My new ball joint came with the boot already installed with a one time use ring. I put the boot through the hole in the knuckle and pressed the ball joint in with the boot on the ball joint. The boot came out almost entirely unscathed except for the very edge beyond the retaining ring:
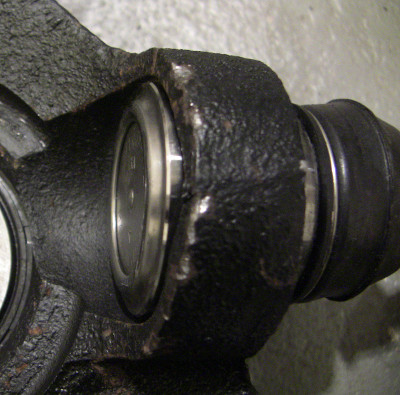
Here is another view of the installed ball joint:
Install the snap ring and you are done: